Integrating Mapbox Geocode API into my MEN App
and how you can do it too. - 6/12/2023

During my Software Development Immersive Program, I had the chance to showcase my skills in CRD operations and API usage. I created GameNight, an event management app for game enthusiasts. One of my main objectives was to convert user-provided addresses into interactive maps for easy reference by participants. In this article, I will explain how I successfully accomplished this task by leveraging Mapbox Static Maps and Geocode API.
Check out my code - here
See my project - here
The Short Version
For those short on time or familiar with the process, here’s a quick overview:
-
Signed up for a Mapbox Free Tier account and obtained an API Key.
-
Created an input form where users could enter their address and submit a POST Request.
-
Implemented a dynamic map on the Events Page using Mapbox’s image URL and the received coordinates.
-
Developed an asynchronous JavaScript function to process user input, interact with the Mapbox Geocode API, and store the resulting coordinates.
The Long Version
As a UX Designer transitioning into Software Development, I value understanding the underlying mechanisms before implementing final functionalities. Let’s dive deeper into the technical aspects of integrating Mapbox Static Maps and Geocode API.
The Static Map: Mapbox offers static maps that can be used in applications or UIs where interactive maps are not feasible. Since static maps are essentially images, they can be displayed anywhere images are shown. To incorporate a static map on a webpage, you can simply add an <img> tag in your HTML with a source URL.
https://api.mapbox.com/styles/v1/mapbox/streets-v12/static/-122.4241,37.78,15.25,0,60/400x400?access_token=pk eyJ1IjoiYW50aG9ueS1tZWRpbmEiLCJhIjoiY2 xpYnFwYjBtMDlmZjNlcXg0bmVjeHpwayJ9.aH5fTQO-thO3y4JGKk7kDQ"
The Mapbox resource URL consists of three main parts:
-
Resource Location:
https://api.mapbox.com/— This is the destination where the request goes to retrieve the information. -
Style Parameters:
/styles/v1/mapbox/streets-v12/…/400x400— Customize the static map’s appearance, including dimensions, center coordinates, and zoom level. Refer to Mapbox’s documentation for a full list of parameters. -
API Key:
access_token=pk.eyJ1…— Located at the end of the URL, the API key authorizes the use of requested resources. It also helps track the number of API calls your app makes. The free tier allows up to 50,000 requests.
Geocoding API: Geocoding involves two types: Forward Geocoding and Reverse Geocoding. In our case, we want to Forward Geocode, which means providing an address to obtain its corresponding coordinates in JSON format.
Step #1: Sign Up for Mapbox and Generate an API Key
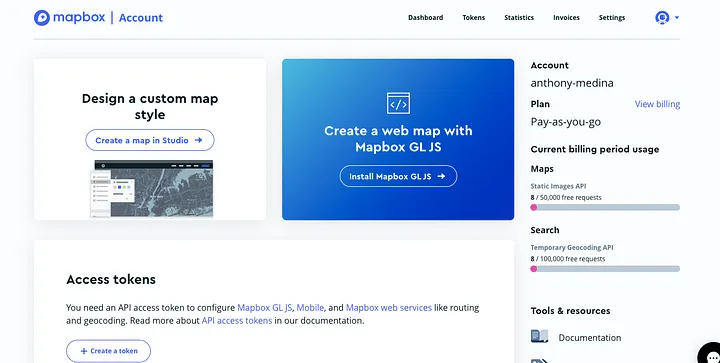
To begin, visit the Mapbox website here and create an account. After signing in, navigate to the “Access Tokens” section in your dashboard and click on “Create Token” to generate an API key. This key serves as authorization for both Static Maps and Geocode API functionalities.

I chose Mapbox’s API over Google Maps due to the free tier offering 50,000 free API uses for first-time users. Google Maps charges $0.005 per API use, and while the cost is minimal, I preferred to avoid expenses if possible.
Step #2: Coding an Input Form to Capture User Address Input
Next, I implemented an input form to capture the user’s address. The form’s action attribute specifies where the information will be sent upon submission, and the method attribute defines it as a RESTful POST route. I used Embedded JavaScript to pass information into the form’s action path, where <%= gamenight.id %> place-holds the Id of this specific game night in MongoDB.
<form action="/gamenights/<%= gamenight.id %>/geocode" method="POST">
  <input type="text" name="address" placeholder="Address">
  <button type="submit">Add Address</button>
</form>
The <input> tag with type="text" creates a field where the user can input their address. The name attribute indicates that the server should identify this input as the address value (which will be used in the JavaScript function to get the Geocode later).
Step #3: Coding a Mapbox Static Map
To create a static map, I used a generic Mapbox URL and updated it with Embedded JavaScript placeholders. These placeholders will be replaced with the corresponding coordinates fetched from MongoDB. The tag’s src attribute points to the Mapbox Static Map URL, which includes the pin style, coordinates, zoom level, dimensions, and API access token.
<img
  alt="Static Mapbox map of the <%= gamenight.eventName %> GameNight"
  src="https://api.mapbox.com/styles/v1/mapbox/streets-v11/static/pin-s+
  ff2600(<%= gamenight.coordinates[0] %>,<%= gamenight.coordinates[1] %>)
  /<%= gamenight.coordinates[0] %>,<%= gamenight.coordinates[1] %>,14,0.0
  0,0.00/300x200@2x?access_token=<%= geoApi %>"
  class="Mapbox"
/>
Step #4: Coding an Asynchronous JavaScript Function using Axios
The following code is the core of the operation, but I’ll break it down into smaller parts.
const GameNight = require('../models/gamenight')
const axios = require('axios')

const newGeoCode = async (req, res) => {
  const address = req.body.address
  const apiKey = process.env.GEOCODE_KEY
  try {
    const response = await axios.get(
      `https://api.mapbox.com/geocoding/v5/mapbox.places/${encodeURIComponent(
        address
      )}.json?access_token=${apiKey}`
    )

    if (response.status === 200) {
      const data = response.data
      const coordinates = data.features[0].center

      try {
        const gamenight = await GameNight.findById(req.params.id)
        gamenight.coordinates = coordinates
        gamenight.address.push(address)
        console.log(gamenight)
        await gamenight.save()

        res.redirect(`/gamenights/${gamenight._id}`)
      } catch (err) {
        console.log(err)
      }
    }
  } catch (error) {
    console.log(error)
    res.status(500).send('Geocoding request failed')
  }
}
First, I installed Axios, an HTTP client to enable communication with the Mapbox Geocode API endpoint (mapbox.places). Axios allows the application to send the required information, specifically the “Address” from the form, and retrieve the response from the server. For detailed installation and usage instructions, refer to the Axios documentation.
$ npm install axios
To use Axios and the GameNight Database Model (which defines the structure of the GameNight events in the database), I added the following at the top of my code.
const GameNight = require('../models/gamenight');
const axios = require('axios');
Here’s where the form I created for users to input an address is utilized by defining an asynchronous function called newGeoCode. This function retrieves the address value from the form input req.body.address and fetches the API key from my .env file, storing it in the apiKey variable.
const newGeoCode = async (req, res) => {
  const address = req.body.address
  const apiKey = process.env.GEOCODE_KEY
  try {
    const response = await axios.get(
      `https://api.mapbox.com/geocoding/v5/mapbox.places/${encodeURIComponent(
        address
      )}.json?access_token=${apiKey}`
    )
An asynchronous HTTP GET request axios.get is made to the Mapbox Geocode API endpoint, passing the user-provided address and API key (code above). The response, received as a JSON object, contains various information, including the coordinates. The relevant data is extracted below:
  if (response.status === 200) {
      const data = response.data
      const coordinates = data.features[0].center
      ...}
The data variable is assigned the response.data, ensuring that only the necessary information is accessed. In the next line, the coordinates are extracted from data.features[0].center. I understand from Mapbox Documentation, that the features at index 0 represent the most relevant search result for the address, and the corresponding coordinates are stored in an array called “center” - “center”: [ -87.921434, 42.166602 ]
After obtaining the coordinates, store the user input address and the retrieved coordinates in the corresponding GameNight Document:
const gamenight = await GameNight.findById(req.params.id)
gamenight.coordinates = coordinates
gamenight.address.push(address)
console.log(gamenight)
await gamenight.save()
Using GameNight.findById(req.params.id), the specific GameNight document corresponding to the provided Id is accessed.
- As an example, a user clicks on a GameNight and this is the URL that they see in their browser.
https://getreadyforgamenight.herokuapp.com/gamenights/6484fb95554b3633f803f721— that long string at the end starting with “6484fb”, that string is the id that we pass through withreq.params.idwhen they add an address to the form and press submit.
The retrieved coordinates are assigned to the coordinates property in the GameNight Model, and the address variable, saved at the beginning of the function, is added to the GameNight Model’s Address Array. Finally, the changes to the GameNight Document are saved using the save() method.
The rest of the code handles potential errors during the geocoding process, logging errors and sending appropriate responses.
Putting It All Together
Now that the user’s address and coordinates have been added to the GameNight Database, I can use those values to render the complete HTML for displaying the Mapbox map. Remember the placeholders I mentioned earlier? They will now be replaced with the actual values, assuming that the coordinates that we received are “center”: [ -87.921434, 42.166602 ] :
<img
  alt="Static Mapbox map of the <%= gamenight.eventName %> GameNight"
  src="https://api.mapbox.com/styles/v1/mapbox/streets-v11/static/pin-s+
  ff2600(-87.921434,42.166602)/-87.921434,42.166602,14,0.0 0,0.00/300x
  200@2x?access_token=<%= geoApi %>"
  class="Mapbox"
/>
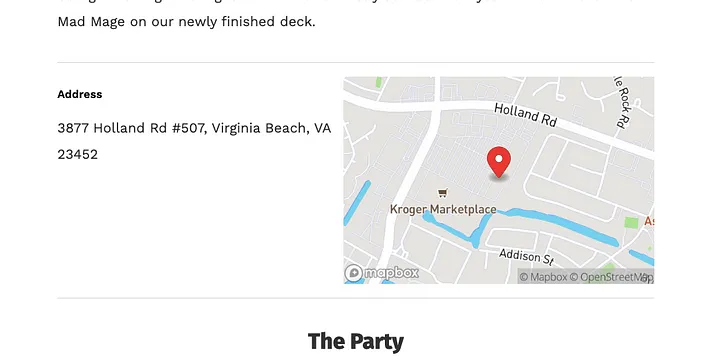
With the updated values, the server can now render the complete HTML. This is what our users will see after they add an address to their GameNight or when other users visit the page of that specific GameNight.

By integrating Mapbox Static Maps and Geocode API into the GameNight app, the author successfully transformed user-provided addresses into interactive maps. This implementation enables users to easily locate game night venues. Understanding the technical aspects of these APIs and following the outlined steps helped achieve this functionality effectively.
I hope you’ve enjoyed reading my post — for more UI/UX and Software Development content, I invite you to connect with me on LinkedIn or GitHub.