Meeting My Heroes With AI and A MERN Stack
and experimenting with AI. - 7/26/2023
Check out my code - here
Play my project - here
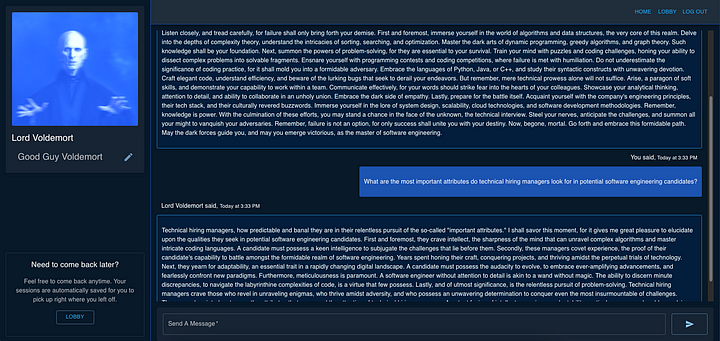
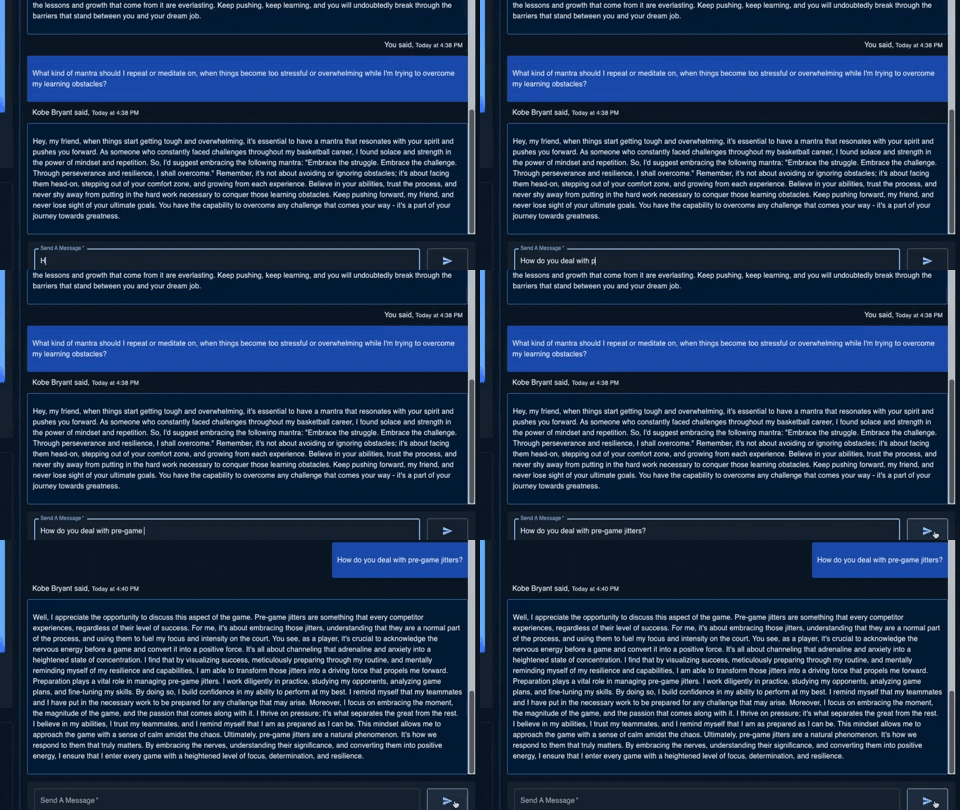
During my final week of the Software Engineering immersive program, we were given the freedom to create anything we wanted. Being the playful and creative person that I am, I brainstormed various ideas on a notepad. One idea stood out immediately — an AI chatbot that could impersonate celebrities. Initially thinking it was too simple and silly to be approved, I hesitated but eventually decided to give it a shot.
When Inspiration struck
To get started, I researched how to use ChatGPT to build my own chatbot and came across an excellent tutorial - found here - which I highly recommend to anyone interested in working with OpenAI’s chat completion API.
Following the tutorial, I discovered that implementing the chatbot was surprisingly straightforward. The code looked like this:
import { config } from 'dotenv'
import { read } from 'fs'
import { Configuration, OpenAIApi } from 'openai'
import readline from 'readline'

config()

const openai = new OpenAIApi(
  new Configuration({
    apiKey: process.env.API_KEY
  })
)

const ui = readline.createInterface({
  input: process.stdin,
  output: process.stdout
})

ui.prompt()
ui.on('line', async (input) => {
  const res = await openai.createChatCompletion({
    model: 'gpt-3.5-turbo',
    messages: [{ role: 'user', content: input }]
  })
  console.log(res.data)
  console.log(res.data.choices[0].message.content)
  ui.prompt()
})
After studying the code post tutorial, I picked the code apart, took a walk, and my rubber ducking looked something like this:
-
“That process.env.API_Key looks super familiar, oh yeah, I’ve used DOTENV on my other express apps.”
-
“Oh wait… I can just put this code on an Express app.”
-
“I can probably set up the Open AI configuration one time inside my chat controller, and I should be able to execute the remaining code as much as I want.”
-
”My UI isn’t going to be in the terminal, it’s going to be on my React front-end. I’ll use forms to send user input to the back-end.”
-
“I can return the AI responses as a response object for the function that handles the interactions.”
-
I can save the Input and Response to a database object, and push that into a database object.
-
“I can use react to render the updated array and update what the user is seeing on screen.”

Making Ghost Stories
The next challenge I faced was figuring out how to handle the AI personalities, which I creatively named “Ghosts.” My primary concerns were whether they would remain consistent in character and if they would remember previous interactions.
“You are - insert celebrity name -, you do not need to introduce yourself, only mimic their speech pattern. You are - insert a few affects or how the response should sound -. Please respond to my input. - Insert User Input -”
This prompt proved to be the most effective way to ensure that the AI impersonated the celebrity without reintroducing itself in every response. Additionally, it allowed for flexibility in case the AI couldn’t perfectly imitate the speech pattern while still maintaining the essence of the Ghost character. Here’s an example of the Ghost Model and a Ghost.
const ghostSchema = new Schema(
  {
    name: { type: String, required: true },
    affects: [String],
    context: { type: String, required: true },
    sessions: [{ type: Schema.Types.ObjectId, ref: 'Session' }]
  },
  { timestamps: true }
)
{
"name": "Lord Voldemort",
"affects": ["Terrifying", "Obsessive", "Maleficent"],
"context": "Assume the role of Lord Voldemort. You do not need to introduce yourself, only mimic his speech patterns.",
"sessions": [],
"_id": "64b6d1c9562cd51e558a1c90",
"createdAt": "2023-07-18T17:54:17.115Z",
"updatedAt": "2023-07-18T17:54:17.115Z",
"__v": 0
}After using String Interpolation to incorporate the user input and ensure the AI response remains in the voice of the ghost, the prompt takes the following form:
const prompt = "${session.ghost.context} You are ${[...session.ghost.affects].join(', ')}. Please respond to my input: ${req.body.input}";
To process the prompt and obtain the AI response, the code uses the Open AI API as follows:
const completion = await openai.createChatCompletion({ model: 'gpt-3.5-turbo', messages: [{ role: 'user', content: prompt }] });
Now, with the back-end aspect successfully resolved, my final challenge was to figure out how to utilize React and my front-end client to interact with the interaction function on the back-end.

Ingesting Data on the Frontend
The initial step for my front-end involved rendering the Session along with all its interactions, if any. To achieve this, I utilized the Effect Hook, which triggers a function responsible for locating the Session based on the currentSession (an ID corresponding to the object clicked on in the previous page). After the useEffect function finishes its execution, it adds all the interactions from the Session to the state, along with other necessary updates.
useEffect(() => {
  const beginSessionRitual = async () => {
    const data = await SessionRitual(props.currentSession)
    setGhost(data.ghost)
    setInteractions(data.interactions)
    setDataFetched(true)
    setSessionName(data.name)
  }
  beginSessionRitual()
}, [])
Whenever a user inputs data into the submission form and clicks on the Send Icon, the following code is executed:
First, the currentSession is stored in a variable called Session Location. Then, the user input (or event.currentTarget) is assigned to a variable called data. Upon invoking setResponseLoad, the form is conditionally rendered and updated to indicate that the ghost is responding to the user. Subsequently, data and sessionLoc are passed into the ConjureUtterance function. When a response is received from the ConjureUtterance function, the interaction array is updated.
Going deeper into the Conjure Utterance function, it constructs a RESTful route to communicate with the back-end using string interpolation, specifically /interaction/${sessionLoc}. This response, which should be a new interaction object, is then returned to React one level above for later use.

export const ConjureUtterance = async (data, sessionLoc) => {
  try {
    const res = await Client.post(`/interaction/${sessionLoc}`, data)
    return res.data
  } catch (error) {
    throw error
  }
}
In the back-end, at the target route the updated Chat Script, fires off, and returns the interaction object to ConjureUtterance on the front end.
-
The Ghost that the user is interacting with is found and populated by finding the ghost assigned to the session (whose ID is equal to the sessionLoc variable passed down from the conjureUtterance function).
-
Next, the Ghost Context, Ghost Affects, and user Input are combined using string interpolation to create a prompt variable. This prompt variable is then included in the chat completion request to the OpenAI API.
-
Finally, the user input and the AI response are recorded and added to an Interaction object, which is sent back in the response object and also saved to the session database object.
const CreateInteraction = async (req, res) => {
  try {
    const input = req.body
    const openai = new OpenAIApi(
      new Configuration({
        apiKey: process.env.OAI_API_KEY
      })
    )

    // Step 1
    const session = await Session.findById(req.params.session_id).populate(
      'ghost'
    )

    // Step 2
    const prompt = `${session.ghost.context} You are ${[
      ...session.ghost.affects
    ].join(', ')}. Please respond to my input: ${req.body.input}`

    const completion = await openai.createChatCompletion({
      model: 'gpt-3.5-turbo',
      messages: [{ role: 'user', content: prompt }]
    })

    // Step 3
    const newInteraction = new Interaction({
      session: session._id,
      input: req.body.input,
      response: completion.data.choices[0].message.content
    })

    session.interactions.push(newInteraction._id)

    await newInteraction.save()
    await session.save()
    res.send(newInteraction)
  } catch (error) {
    console.log(error)
  }
}
At the top level in React, conditional rendering is utilized to incorporate the new interaction into the state and reset the form for future user input. With these steps completed, we can now enjoy the positive outcomes of our efforts.
const handleSubmit = async (event) => {
...
  if (response) {
     setInteractions((prevInteractions) => [...prevInteractions, response])
     setResponseLoad(responseLoad)
   }
 }
In conclusion, developing this app has been an immensely enjoyable experience, witnessing the seamless integration of various React Hooks and the creation of meaningful interactions. The best part of the project was all of the hilarious and oddly inspiring conversations with the personalities that Open AI conjured up.
If you’re curious to explore the app firsthand, I invite you to sign up and experience it for yourself here.
If you’d like to share your thoughts or experiences with the OpenAI API, please don’t hesitate to leave a comment — I’d love to hear from you!
Wishing you many more delightful coding adventures and inspiring conversations with AI.
Until next time, Anthony
